

How to Flush a Water Heater: Step-by-Step Guide for Homeowners
Here’s the thing about how to flush a water heater — no one thinks about it until the shower turns cold and the basement starts sounding like it’s boiling a kettle of rocks. Most folks assume their water heater just... works. Quietly. Forever. That’s cute. Meanwhile, it’s collecting sediment — gunking up your tank, shrinking your hot water supply, and hiking your energy bills.
This article isn’t a lecture. It’s a DIY guide for homeowners who’d rather not wait until their heater throws a fit. We’ll show you exactly how to clear out the crud, improve performance, and maybe even save the poor thing from early retirement.
No scare tactics, but fair warning: this job involves hot water, pressure valves, and a little common sense. You’re not building a spaceship — but don’t wing it either.
Why Flush Your Water Heater?
Flushing it isn’t some “nice-to-have.” It’s basic water heater maintenance — like brushing your teeth, except if you forget this one, your energy bills climb and your hot water turns lazy.
The Downward Spiral of Doing Nothing
Water heaters don’t just fail out of nowhere. They warn you. The problem is, most people ignore those warnings because they’re too quiet. Or weird. Or both.
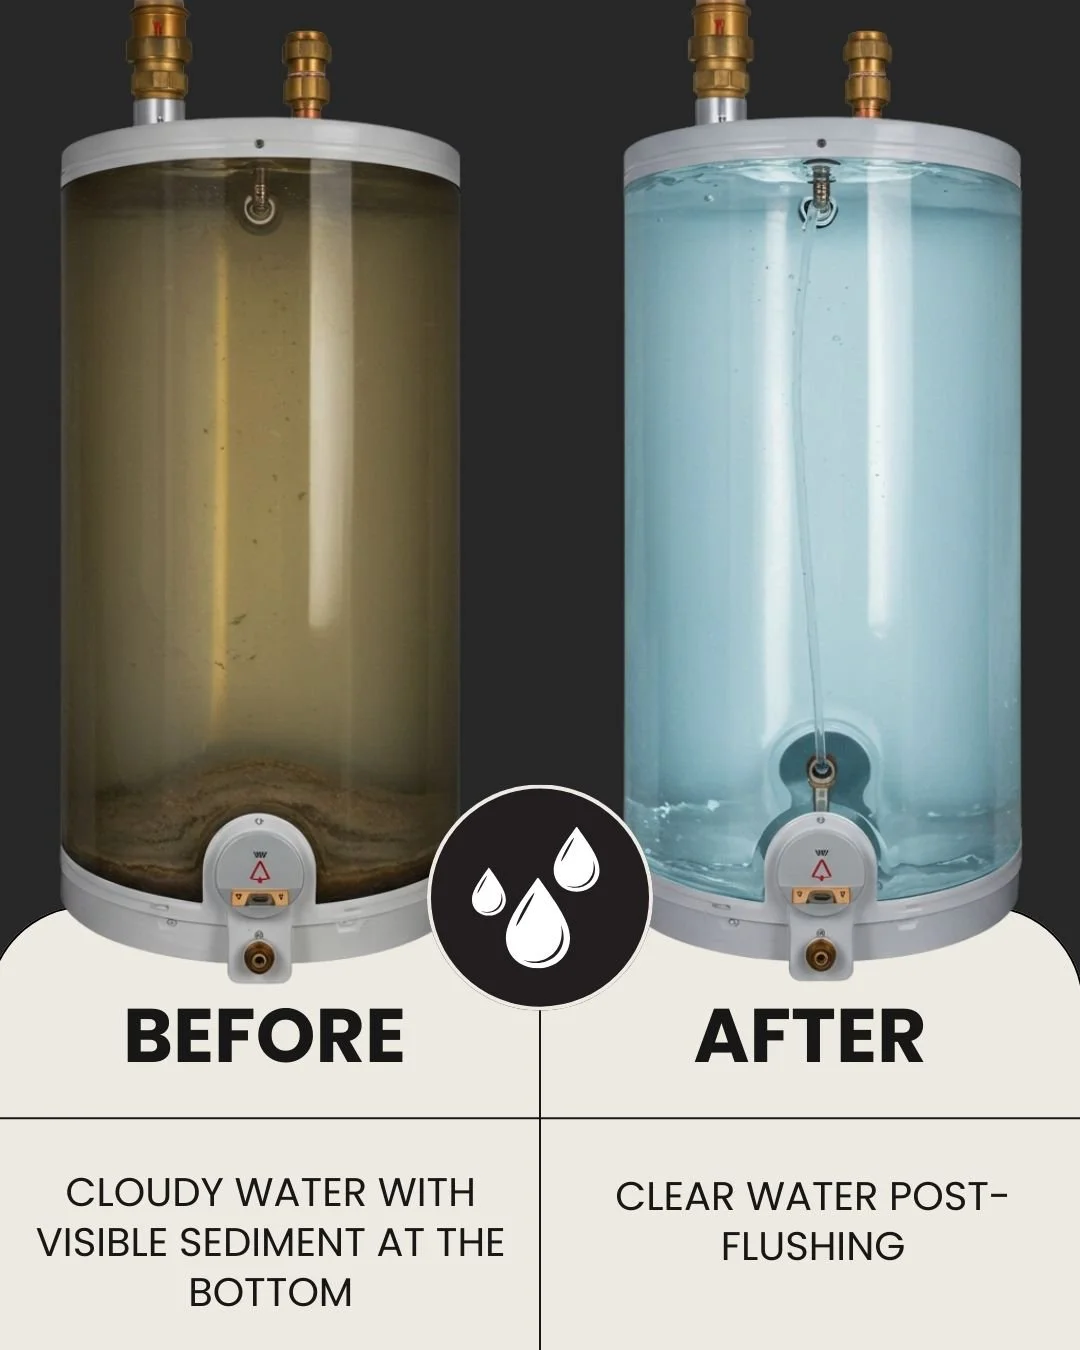
Hearing that occasional popping or rumbling? Not the pipes settling. That’s steam bubbling through sediment.
Getting less hot water than you used to? That’s because sediment is stealing space inside the tank.
Noticed your bill creeping up for no reason? Sediment buildup forces the heater to work longer and harder just to do the same job.
All of this is 100% preventable — if you flush your hot water heater the way you're supposed to.
And when you don't? The tank corrodes faster, energy usage spikes, and your heater’s lifespan gets sliced by a third. Seriously — the Department of Energy backs this. They recommend annual flushing as one of the key steps for maintaining energy efficiency and extending appliance life.
So no, flushing isn’t optional. It’s survival — for your heater, your wallet, and your sanity.
And if it all still feels like a little much? Spotless Plumbers is always around for comprehensive plumbing support — no shame in calling backup.
Tools and Materials You Actually Need
Let’s not overcomplicate this. You’re not doing surgery — you’re clearing out sludge. Still, like any job that involves hot water, pressure, and potential mess, coming prepared is half the battle.
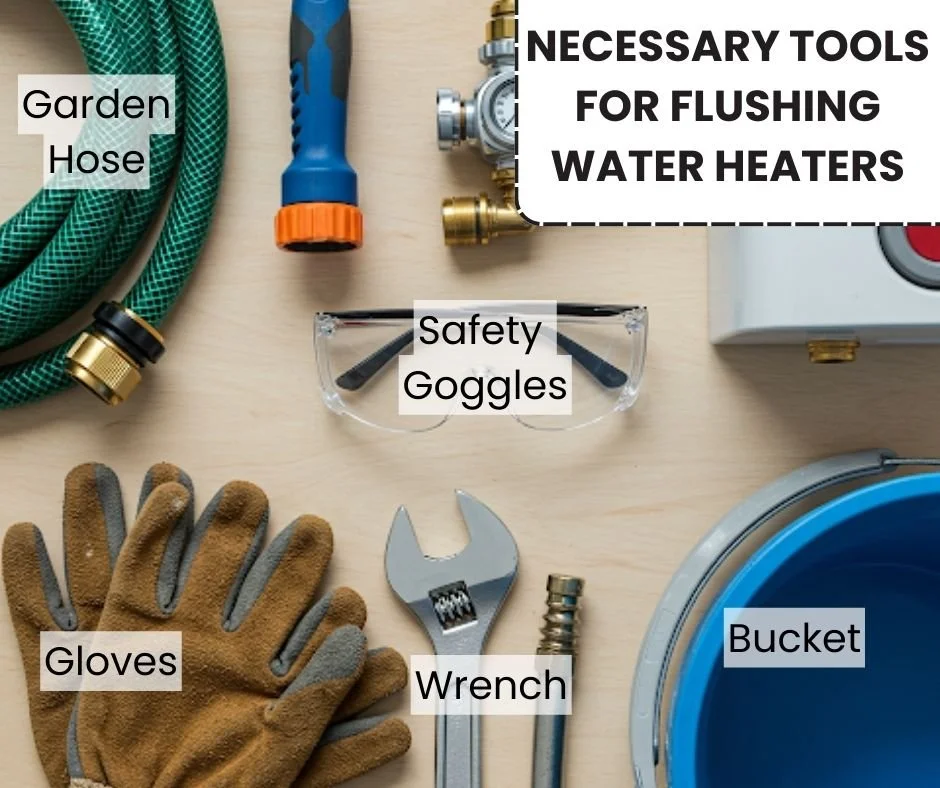
Here’s what you’ll need (and why):
Garden hose – standard. This is your escape route for the gunk inside.
Bucket – for residual water. Because trust us, there’s always more than you think.
Adjustable wrench – loosens the drain valve and says “I know what I’m doing” even if you don’t.
Gloves + safety glasses – hot water + minerals = zero room for heroics.
Water heater flush kit – not essential, but let’s be honest: if you want to clean deep without drama, these kits help a lot. Especially with older tanks that haven’t been touched in years.
Optional, but Smart:
Sediment removal tools – because some of that gunk clings on like it’s personal.
Shop vac – for sucking out the last stubborn inch of water or if your drain valve throws a fit mid-flush.
Having the right gear makes a difference. Half of DIY anxiety comes from being halfway into a job and realizing you're missing something.
You don’t need to spend a fortune either. Most of this is already in your garage. And for everything else? A basic water heater flush kit costs less than the takeout you forgot to eat last night.
These tools matter — but doing the flush right is what keeps you off the call-a-plumber list… unless you’re calling us, of course.
Step-by-Step Guide to Flushing a Water Heater
Flushing a heater is not rocket science. But it’s not guesswork either. Especially when the goal is to actually remove sediment — not just swirl it around like a mineral-infused tea party.
Here’s exactly how to flush your water heater without making a mess, damaging your system, or wasting your Saturday.
Flushing a Traditional Tank Water Heater
You’ve got a traditional tank. So, you’re dealing with a big metal cylinder that heats, stores, and ages like a volcano.
Step 1: Turn Off the Power or Gas Supply
Electric heater? Cut power at the breaker — not the switch, the breaker. Gas heater? Rotate the thermostat down to Pilot or shut off the gas valve altogether. This is non-negotiable. Do this, or burn your eyebrows off.
Step 2: Shut Off the Cold Water Supply
You’re flushing, not refilling. So twist the cold inlet valve (usually blue) to the OFF position. This stops new water from interrupting the purge.
Step 3: Hook Up a Garden Hose
Attach it to the drain valve at the bottom. Run the other end to a safe drainage spot — outside, a basement floor drain, laundry sink. Just not into your carpet.
Step 4: Open the Drain Valve and the Pressure Relief Valve
Open the drain valve first, then crack the T&P valve or a hot water tap in the house. This keeps air flowing in so water flows out — fast and clean. If it’s dribbling out like it’s embarrassed, the vacuum seal is the problem.
Step 5: Stir It Up — Flush It
Open the cold water supply briefly to churn the sediment. Then drain it again. Repeat this until the water runs clear or stops resembling a sandblaster’s backwash.
Step 6: Close It Up
Shut the drain valve. Disconnect the hose. Close the T&P or tap. Basically — plug everything back up.
Step 7: Refill and Power Up
Turn the cold water back on. Crack a hot water tap to bleed air. Wait until it’s flowing steady — then flip the breaker or relight the pilot. Done right, you just gave your heater a full metabolic reset.
Flushing an Electric Water Heater: Mind the Wires
Same steps, with a few extra precautions:
Absolutely kill the power at the breaker before touching anything. Do not rely on the unit’s on/off switch.
Wait for the water to cool. Give it an hour. This isn’t just about comfort — it’s about not burning through plastic parts or starting a new “Why is my breaker tripping now?” side quest
Be mindful of exposed wiring when removing panels (if checking elements or anode rods).
If you're not sure about what you're seeing inside your unit once the panels are open, this is a good moment to call for comprehensive plumbing support.
Flushing a Tankless Water Heater
Tankless heaters sound fancier. They also come with a slightly different set of rules. You’re not draining a tank — you're clearing mineral build-up from a heat exchanger, and you’re doing it with circulation, not gravity.
This is where a water heater flush kit earns its keep.
How to Flush a Tankless Water Heater (Correctly)
Step 1: Power Off and Isolate the Unit
Turn off power and shut both the cold water inlet and hot water outlet valves. Then attach the flush kit hoses to the service ports.
Step 2: Circulate the Descaling Solution
Run a pump to circulate vinegar or a commercial descaler (per manufacturer guidance) through the system. This can take 45 minutes to 1 hour. Don’t guess. Read the label. And use gloves — your skin will thank you.
Step 3: Rinse with Clean Water
After descaling, flush the unit with clean water to rinse out the system and neutralize any acidic residue. Reopen the isolation valves once done.
Reality check: Not every homeowner should DIY this
If the valves are stuck, the unit’s mounted tight, or you’ve never seen the inside of your tankless unit? Let someone else break the sweat. Knowing how to flush a tankless water heater is great. But knowing when not to is smarter.
That’s where we come in. Seriously — if your unit’s overdue or you're unsure what you're looking at, just see our water heater replacement services and let us handle it.

How Long Does It Take to Drain a Water Heater?
Great question. Depends who’s asking.
Tank Water Heaters: Plan for 30 to 60 minutes. That includes draining, flushing, and refilling. If you’re waiting on the water to cool first, add another hour.
Tankless Units: Budget 1–2 hours. Setup, flush cycle, rinse, and cleanup — especially if using a flush kit.
A few things will stretch or shrink that clock:
Tank size
How much sediment’s packed in there
How recently you flushed it
Your comfort with valves, hoses, and wet floors
Tips for Ongoing Water Heater Maintenance
Let’s be honest. You can do the perfect flush, feel like a plumbing deity, and still end up right back in hot water (in a bad way) if you treat water heater maintenance like a once-a-decade affair.
So don’t.
You don’t have to obsess. But if you don’t keep up with these basic habits, you’re eventually going to hear your heater making weird noises again — and no, they don’t mean it’s “just settling.”
So how often should you flush your hot water heater?
That depends on your water hardness. If you’re in a hard water zone (and most U.S. homes are), you should flush it every 6 to 12 months. Not once every three presidential terms. Not “when you get around to it.” Just… annually. Put it on the calendar next to your dentist appointment.
Why? Because mineral-heavy water deposits scale inside your tank like it’s trying to fossilize itself from the inside. The longer you let it ride, the harder it is to remove. The U.S. Geological Survey backs this with national water hardness data, if you're into numbers. It matters.
Other tasks your heater silently begs you to do
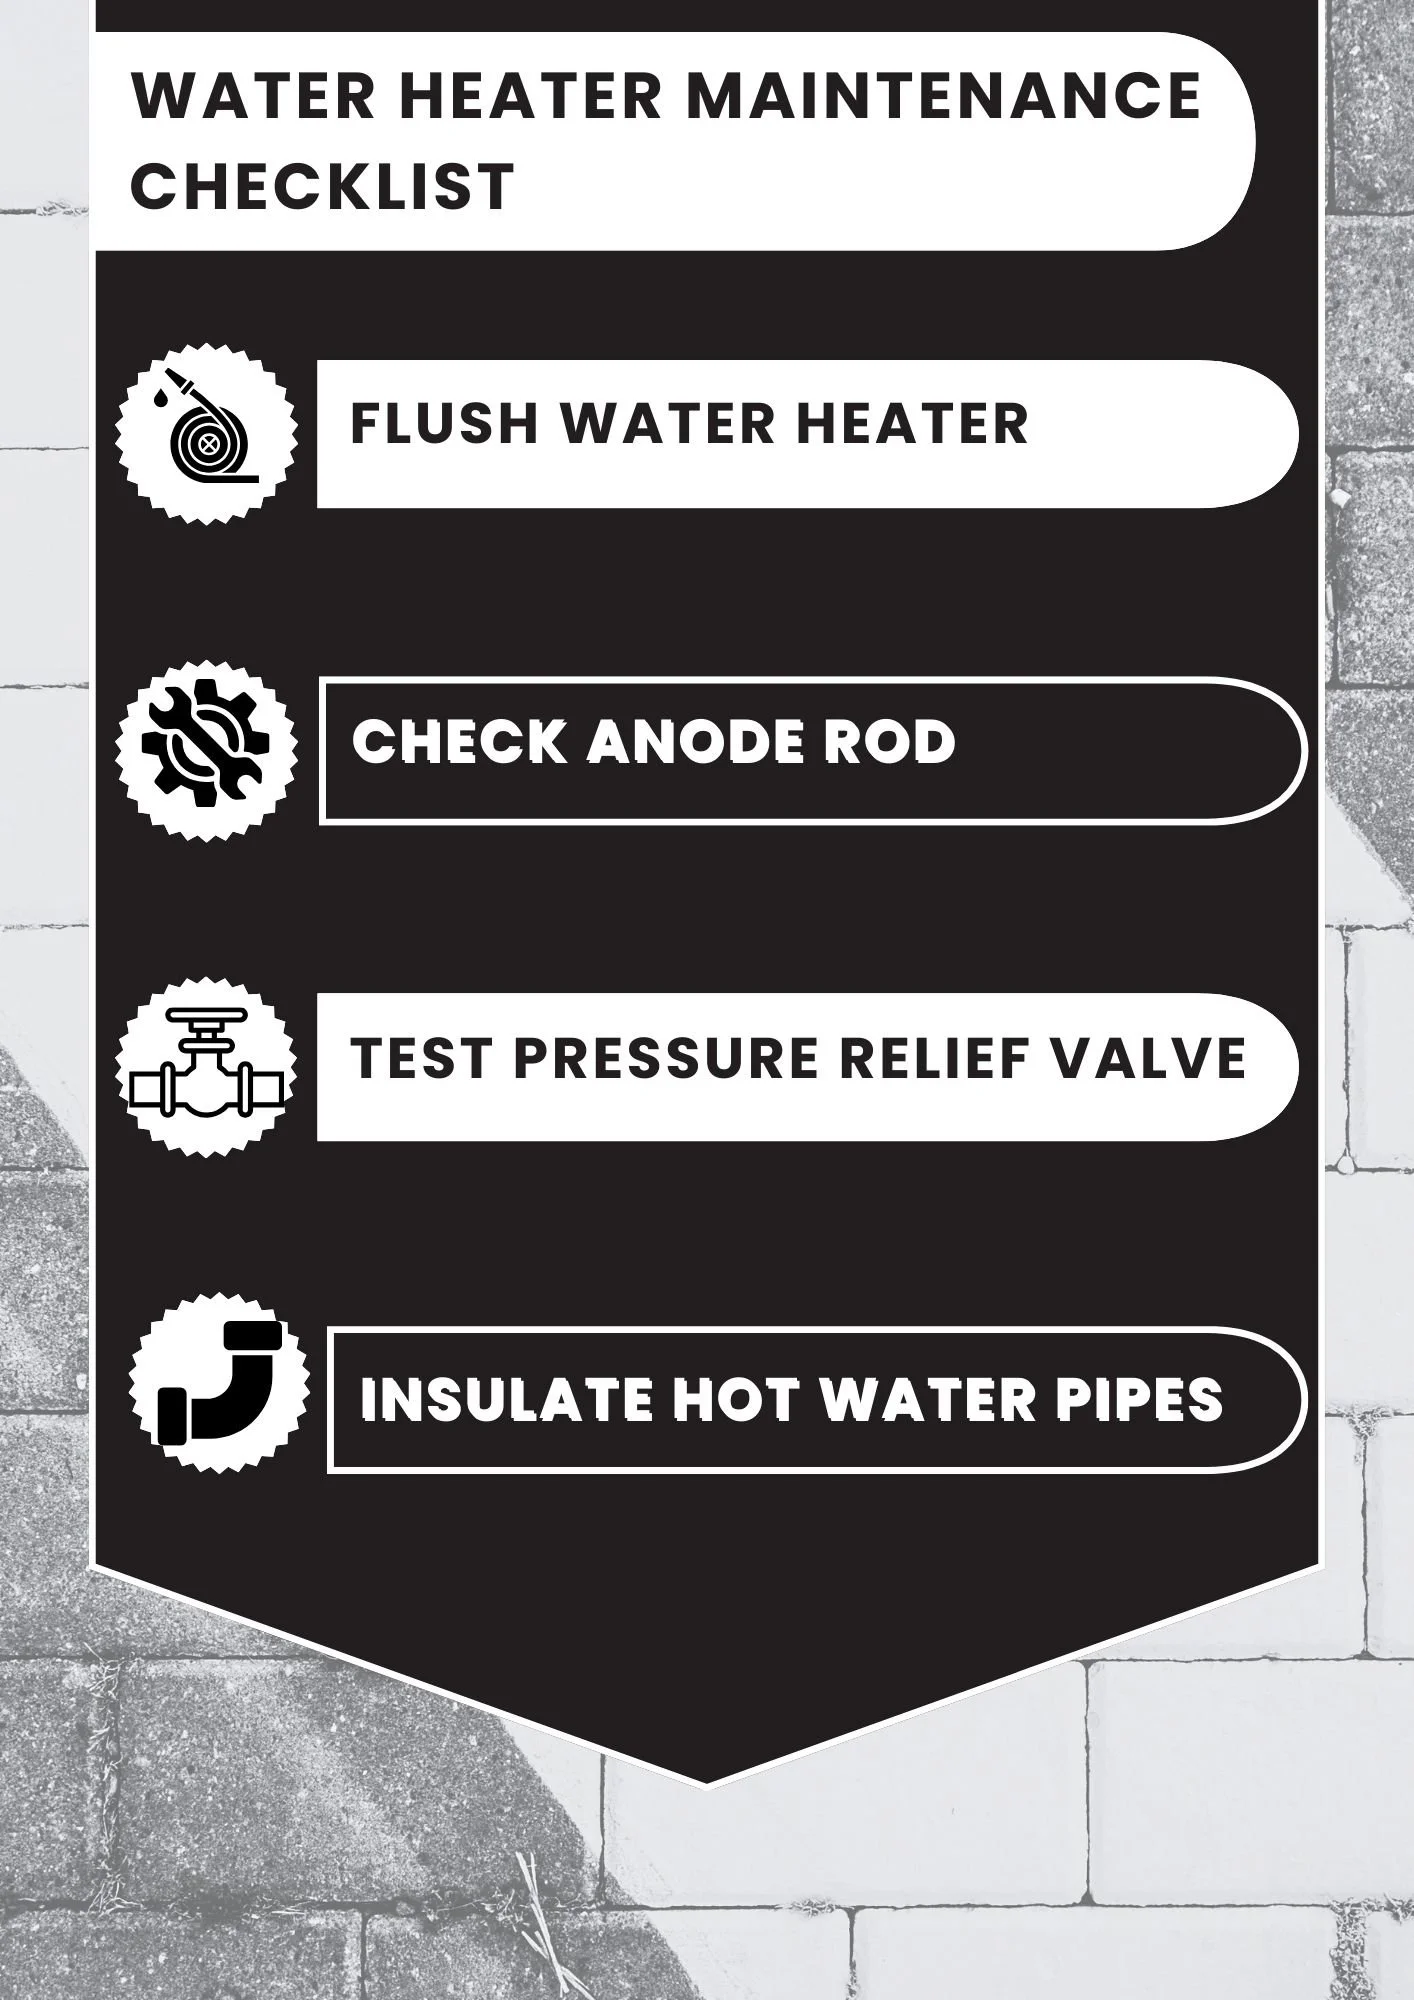
Water heater maintenance isn’t just about flushing. There are a few other checks that keep it from throwing a tantrum:
Inspect the anode rod (every 2–3 years): It sacrifices itself to protect the tank from corrosion. If it’s gone? Your tank’s next.
Test the pressure relief valve: Once a year, lift the valve and check for a proper water release. No movement? You may be sitting on a malfunction.
Scan for leaks: Dampness around the base, corrosion on fittings, or water on the floor? That’s not “normal.” It’s your tank tapping out.
Listen: Popping, crackling, growling — yes, even water heaters have moods. And they’re usually not subtle.
Some people put this off because it’s tedious or mildly uncomfortable. Which is fine… until the discomfort is waking up to a cold shower and a $2,000 replacement job.
If that’s already happened to you — or if the tank’s older than your teenager — it may be time to see our water heater replacement services.
Conclusion
Let’s not dance around it: not flushing your water heater is one of the most expensive “I’ll do it later” decisions a homeowner can make. The irony is brutal — because it only takes about an hour a year to avoid thousands in damage, sky-high energy bills, and the silent war your heater’s been waging against your wallet.
Learning how to flush hot water heater systems isn’t complicated. You just need good instructions, a wrench, a hose, and the will to do it before your tank turns your basement into a slip-and-slide. This guide gave you all of that — and if we’ve done our job right, you now know exactly when, why, and how to flush your water heater without flinching.
But maintenance isn’t a one-time thing. If you want your unit to last, your water to stay hot, and your bills to stay reasonable, follow through. Keep up the simple habits. Check the anode rod. Know when something sounds off. And flush it, regularly — not out of fear, but because now, you know better.
Need a refresher or want to learn more ways to protect your plumbing like a pro? Check out our full water heater guide hub — it’s packed with the stuff you actually need.
Frequently Asked Questions
-
A: Yes, most homeowners can flush a water heater themselves using basic tools and a little caution. It involves turning off power or gas, draining the tank, and flushing it with water to remove sediment. That said, if you're uncomfortable dealing with valves, gas lines, or electrical components, it’s smart (and safer) to call a professional for help or ongoing water heater maintenance.
-
A: Signs your heater needs flushing include reduced hot water, strange noises like popping or crackling, or discolored water. If you’ve never flushed it or it’s been over a year, it likely needs it. Living in a hard water area also means you’ll need to flush it more often—ideally every 6 to 12 months—to keep things running efficiently.
-
A: Skipping flushes leads to sediment buildup, which forces your heater to work harder, reducing efficiency and shortening its lifespan. Left long enough, the sediment can cause internal damage, loud noises, reduced water output, higher energy bills, or complete failure. Regular flushing prevents all of that and helps your unit stay efficient and reliable longer.
READ MORE…
8 Common Water Heater Problems: A Homeowner’s Guide
How Does Plumbing Work? What Your Plumber Knows That You Don't
Top 10 Reasons for Low Water Pressure in Your Home
The Ultimate Guide to Fixing a Leaky Sink Drain Pipe